This piece of furniture has been around for many years.
The joint glue has either dried out or loosened over the decades & the left arm is busted in a couple places.
It's been upholstered twice at least with one coat laid over another.
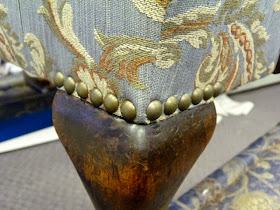
The wear on the arms (patina) is really nice.

I got all the layers of tacks and staples out of the frame.
Every joint & finished wood really needs attention. So I'm gonna send it out of house.

I'm real happy how it was glued up, the arm repaired & the wood freshened up without removing all that nice patina.
First up lets get some traditional webbing on that base.

The coils installed, anchored in place & hand tied.

Fresh burlap covering & new cotton nosing.

Fresh cotton before the pre sewn designed liner.

Two full coats of hand sewing on three sides.

All the old cotton disposed, the horse hair dusted out & reset of course.

A half coat of cotton and set the liner.

Another half coat of cotton before the final covering on this 3 sided base.

Looking thin, crisp & tight. With a nice proud nosing on the front & sides.

Now onto the inside back.

Discarded all the old cotton & reset all the horse hair & straw.

A little more hand sewing.


Dabbling with the stuffings now, really pays off with a nice job later.


A nice full coat before the liner.

Ready for a half coat of cotton & tailor up this inside back.


Time to knock the outside back.


Down proof ticking I have seen last 50 years or more. When the cushion starts to look lazy stop in an upholstery shop & have more feather & down added.

Tightly sewn with interior compartments.

 Patterned, cut, stitched & packed.

 Chosen decorative tacks.

 Custom plugs for the arm screws.
 Ready to serve.

 Practical Upholstery
The #1 blog in all of blogdom for North American upholstery shops!
Tightly sewn with interior compartments.


The #1 blog in all of blogdom for North American upholstery shops!
Wondering work, Old arm chair change to new one.
ReplyDelete