Look what dropped in looking for some attention in this southern New Hampshire upholstery shop.
The owner knew to have the upholsterer tare down the piece before he restored the frame.
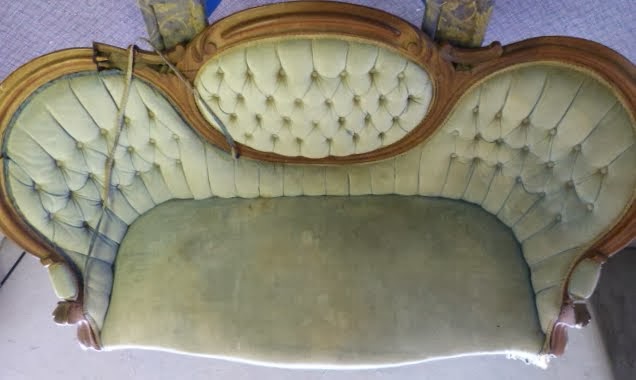
A couple weeks later the frame returned in 5 star shape.
I sure wish I would have taken photos of all the cosmetic work the owner did.
What a nice job, with such a solid and level frame.

Below is the traditional basket weave burlap webbing light set.
If you set the webbing with too much tention you'll warp and crack that frame.

The old tied spring twine was still in great shape. I'm gonna set the springs in the same spots and re tie the springs with new tie spring giving it two coats.


Oh then comes a coat of traditional burlap to cover the springs.

I'm making a nice firm drum here.

I have nosing of different sizes in house but i'm gonna use this custom sewn and tailored nosing made for this piece originally from horsehair.

3 times i ran this nose with hand sewing thread to set the nose.


The straw was still in really fine shape.
I dusted it all out and re tailored it on to the base.


I needed more straw.
I pulled this out of the "bone yard" in the back of the shop.


There was 2 inch foam in this base set. Time to replace it with new firm good dense foam.
All custom cut with angles.


Now on top, a nice full thick coat of cotton.

Now for a lining. I used thin silk like new material from in house to set all the stuffings in place.

The nosing hand sewn in pretty good looking as seen below.

Shooting to keep the nosing in a constant contour with the frame.

And more topping.
A thin coat of cotton.

And the finish fabric the owner chose from my in stock fabric library.

I take the extra time to set the stuffings before tacking down the back side.

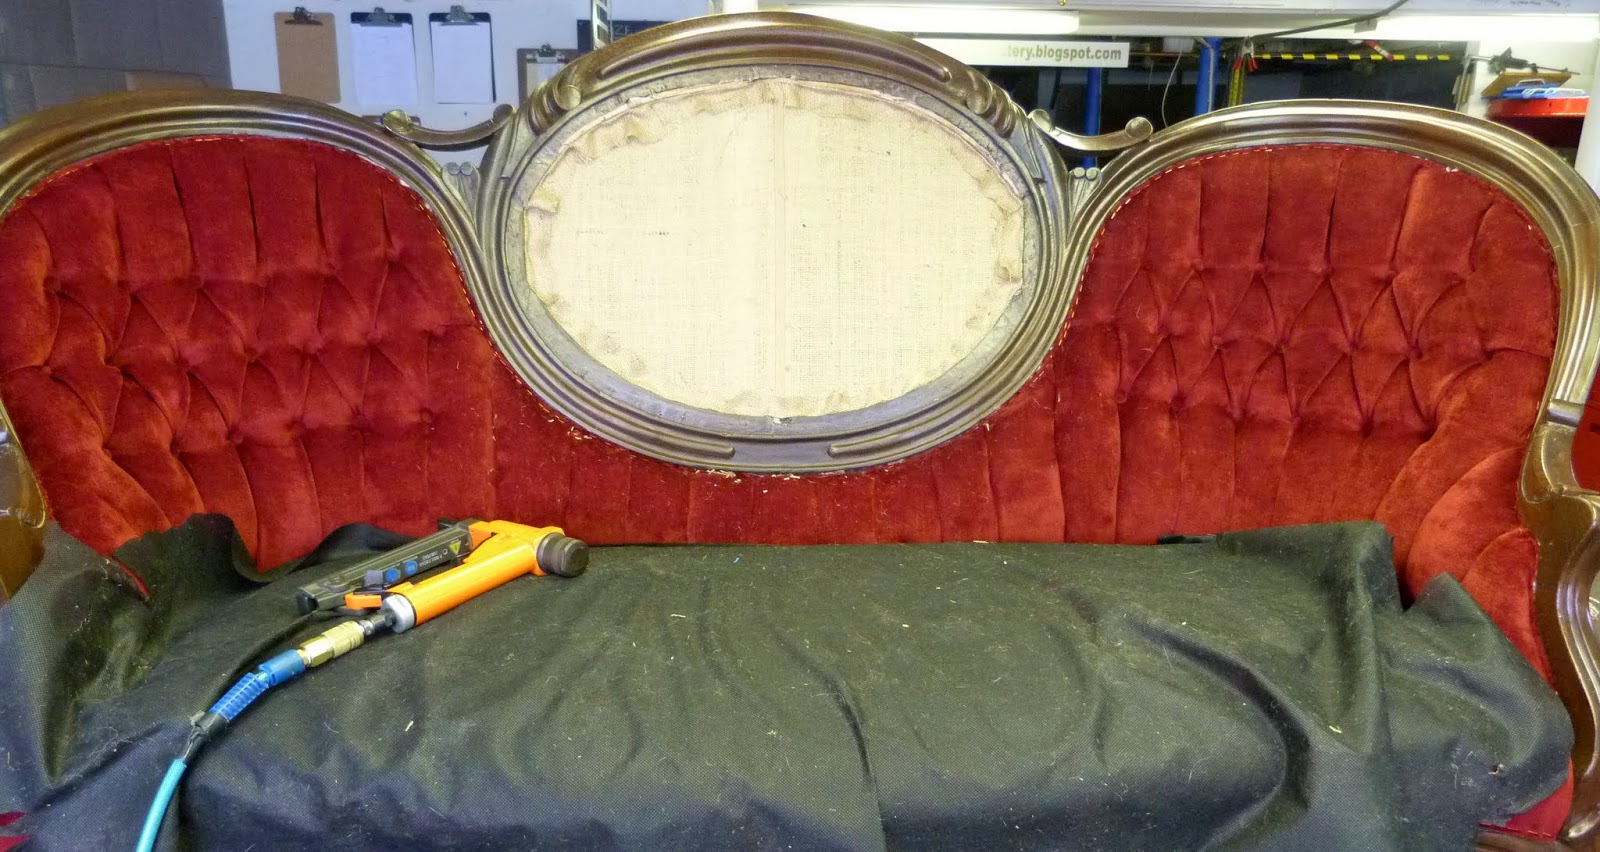
And a dust cover cut in place to protect the new fabric as it is now time to start working all that tufting.

The old insets with horse and sow hair.
ready to be re-worked.

Fresh traditional burlap backing, set as before.

It's a start.

Working these up together really helps keep the symmetry.


Enough tailoring on the ends. I'm gonna catch up the middle shield with new burlap as before.
The old tufting sure has some very small folds.


I worked the stuffings to give me the opportunity for larger tuft folds.

Lots can go wrong here. and being level is another important thing to look out for.


I re set the little arm caps with horse hair and fresh cotton before upholstering.


I really did not rush in closing out the inside of this piece. Over a couple days i really spent an effort to get the inside as perfect as i am capable of.

Now the 3 piece under layment for the outside set tight and trimmed.
A thin coat of fresh cotton layed on top befor setting the upholstery fabric.

The sewn and steamed seams really help keep the piece looking as good as possible.

This double piping i stitched up was a real challenge.
It only takes one mistake and the grade quality really would dive as i apply a liberal amount of hot melt glue all around inside and out.
Without any glue seeping out.


Time for a good shop clean up.

I took my time giving this piece a final look over using the 3 tools shown below.


Cleaning and maintenence.
The tufts should never be vaccumed or scrubbed as you will lose the pleating.
general dust is the main issue and the best way is to blow the dust away with an air chuck once a year or so.


Sure was a challenge for me to take on this piece.

Thanks for looking!
Practical Upholstery
The #1 blog in all of blogdom
for small town North American upholstery shops.
No comments:
Post a Comment